


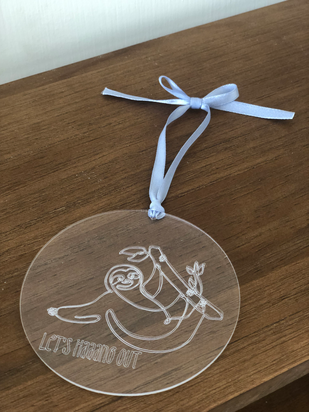


Feeling productive this weekend! I've finally made my first engraved Cricut project - a hanging sloth acrylic decor.
The sloth philosophy is all about mindfulness - I don't work every minute every day, but that doesn't mean I'm lazy or unmotivated. Sometimes taking things slow is a responsible act, to make sure you're doing the right things and doing things right. Take good care of yourself, prioritise work, and always be grateful ♡
******
How to make it
Draw or find a line image with transparent background, flip the image horizontally in your Cricut Design Space*, and secure the acrylic disc on the Cricut cut mat with tape. If you're using a coloured/frosted acrylic sheet, put the coloured/frosted side up. The maximum thickness you can cut on a Cricut Explore Air is ~2mm, I've moved all the star wheels to the right so that the 2mm disc slides in properly.
The Cricut Maker has its own engraving tool, but if you are using a Cricut Explore like me, just upload your line art as a cut image.


And there you have it! Hang it in front of darker walls, on a window, on your door knob... you name it! The clear acrylic decor works best at where it catches light ☀️
* Alternatively, you can do a mirror flip when you cut, but I find it easier to visualise where to place on the mat by flipping it in the canvas.
Tips
My experience is that my Cricut machine will cut slightly to the right on the mat, so I would set my cut image just 0.1" to the left of where I want it to be
Try inserting a 1:1 circle shape in your design space to make sure the line image doesn't go beyond the disc
Cricut Design Space setting
Material: Heavy Cardstock - 100lb (270gsm)
Pressure: More
Tool: Fine-point blade
Materials/tools
Cricut Explore Air: https://cricut.com/en_us
Compatible engraving tool: https://www.amazon.com/gp/product/B07YX6WY8R
Clear acrylic disc (4" across, 2mm thick): https://www.amazon.com/dp/B09KNJ5JFT
Scrap ribbon
How I would do it differently next time
The engraving is shallower than expected when I used the engraving tool's regular tip, but when I tried again with the precision tip, the sharper blade did seem to cut slightly deeper. Will have to experiment with different tips and different materials next time. Perhaps I'll also try adding colours to the engraved image... anyway until then, that's a wrap for today!
Comments