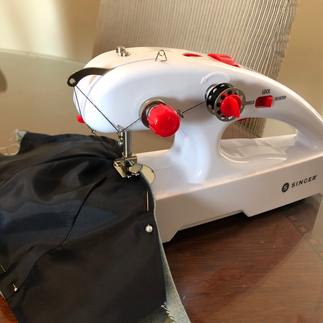
It is April 2022 but sadly we are still staying at home and I doubt we will be taking our masks off soon... What better way to kill time at home than an upcycling project with my new Singer Stitch Quick+?


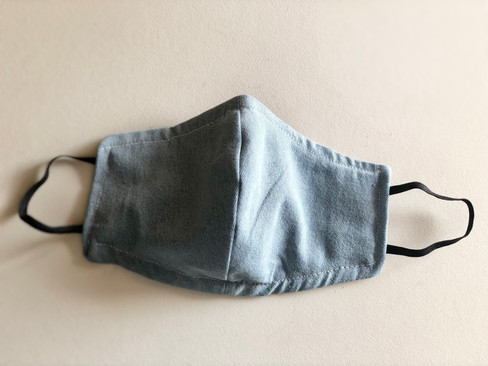
Today I will DIY a reusable mask with old clothes. I got the Singer Stitch Quick+ about a month ago because I wanted a handy sewing machine that won't take up a lot of storage space - and the Stitch Quick+ is the most compact one I can find that has a double bobbin. Let's see if it does what it says!
Materials used:
Singer Stitch Quick+ (from Amazon: https://www.amazon.com/dp/B08PQ54B44)
Scrap fabric (two pieces: your mask pattern, and a lining fabric)
Scrap elastic bands/wire
Pins and bobby pins
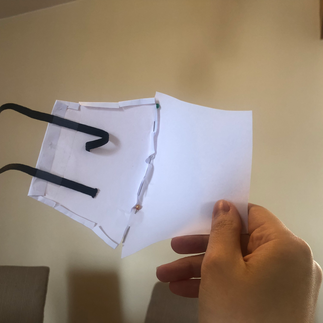
Step 1: I made a sample mask out of paper and adjusted the size as appropriate


Step 2: Cut 4 pieces of the same shape out of your selected fabric (two outer pieces and two linings)*. If your stencil is not symmetrical vertically, make sure for each fabric you cut one piece with the stencil upright and flip for the other piece.
* Here I'm using a soft denim material for outer pieces and a silky material as lining. Choose materials that are breathable and make sure the lining material is smooth soft to touch.
Step 3: Align two pieces of fabric, front to front, and sew the curved side together.


Step 4: Fold a 10-15mm stripe inwards at the back of each se pins or iron to hold the fabric in place. Align the two pieces of fabric back to back and sew them together.
Step 5: Insert nose wire piece and/or elastic band through the stripes on either sides.


Step 6: Insert elastic bands as ear loops and sew the two ends together.


Step 7 (optional): Decorate your mask with stitches or iron-on patches!
Comments